[2 in 1] Etude House Golden Ratio Face Glam #1 (Gold) and Where To Highlight Your Face

greetings readers. *bows*

I bought this product last year during a shopping trip at Berjaya Times Square >> read the entry here << OMG that is just so 2012 xD 


it is quite bulky,and it comes with a cute mirror (which i hardly use lmao).

hardly seen once blended.

//PRICE
for its price (RM 49.90),its surely a worth it product.plus,Etude House was having sale that time so i got 20% discount (hooray!).the packaging is really classy(?) 

//APPLICATION
when i put it on,i didn't have any breakout.however my skin get super oily hence i only wear this occasionally.maybe it's not for the oily type (my skin is extremely oily).

//REPURCHASE
probably no.this one is not even half yet!

//SCENT
it has this unexplain scent which i actually fond of.its not sweetie or fruittie,just..something.

//RATE
3.5/5

now onto our lesson...

where should we highlight our face??


source - google
i'll show you guys properly later on (with my own faceu!)

basically we higlight our faces to enhance our features.
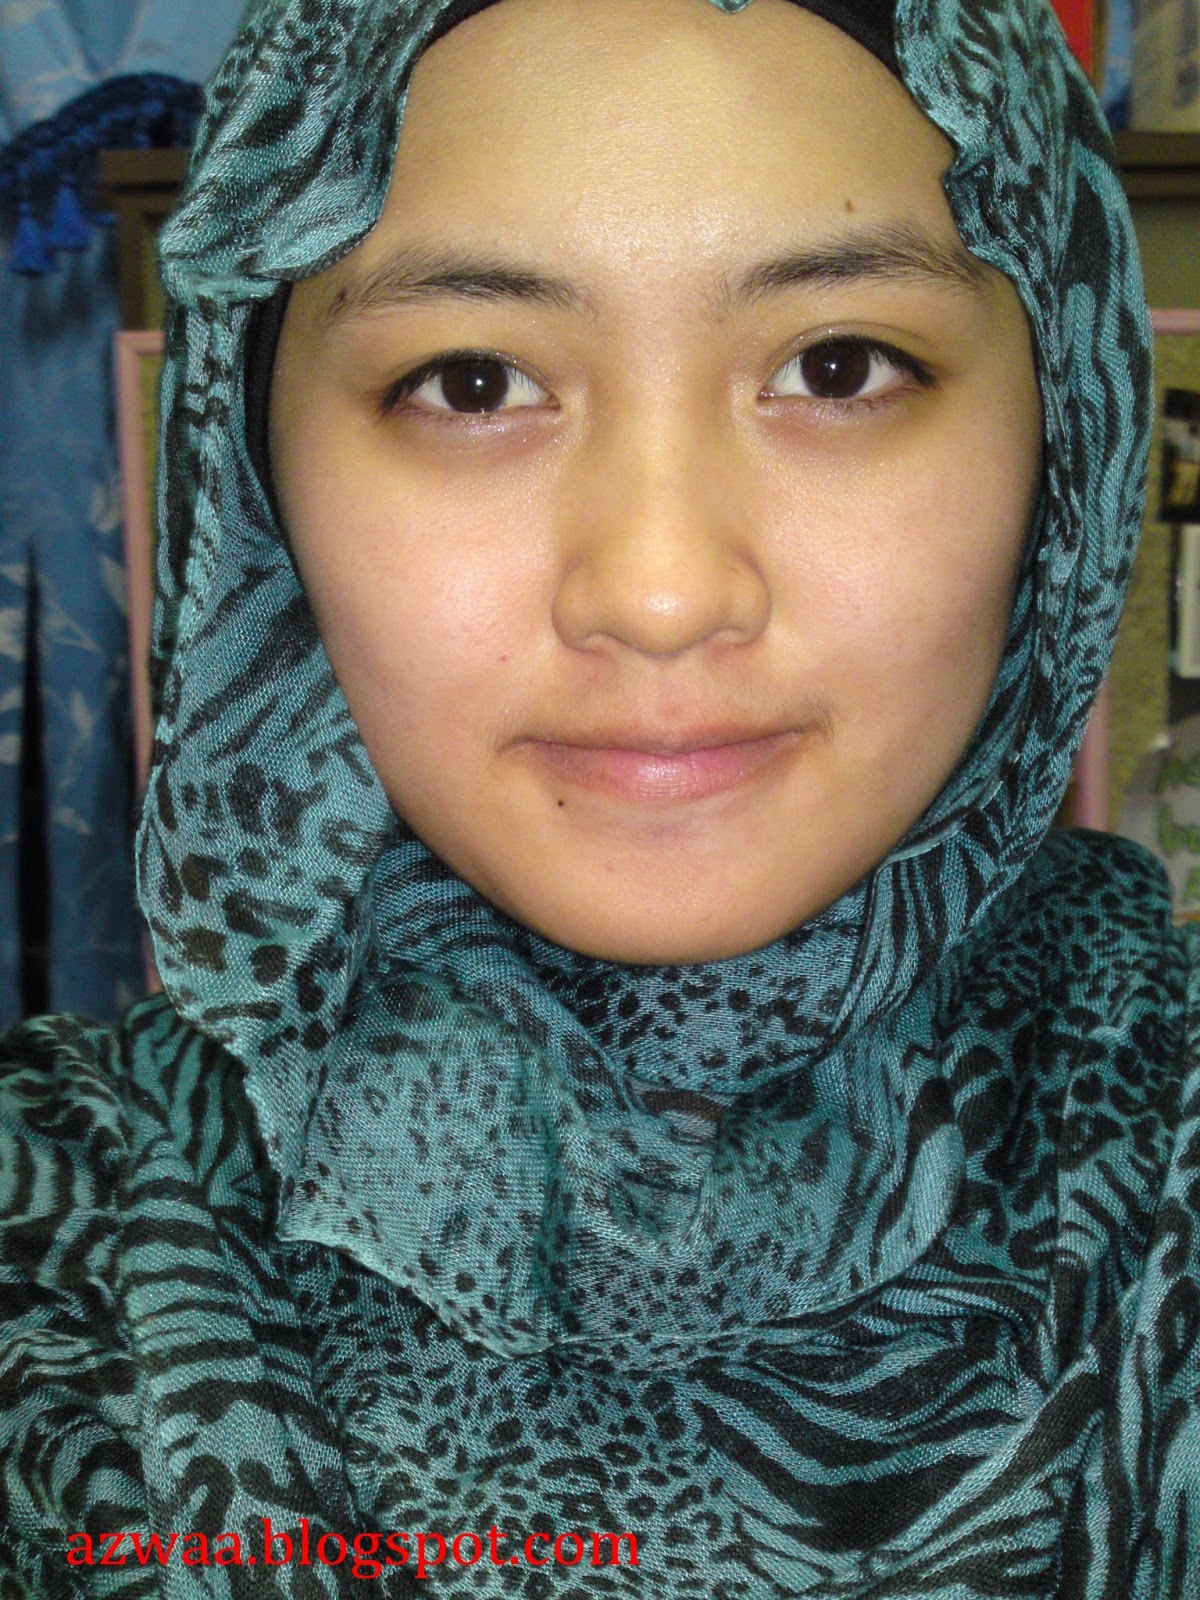
BEFORE

tips - apply with adequate amount to avoid the unwanted "shine"

gently blend in the product,concentrating on the marked areas in the previous pictures.

DONT SPREAD ON ALL OVER YOUR FACE!

AFTER

my face get glowy obviously.

EXTRA

presenting to you my favourite cardigan at the moment.

a black studded cardigan


thank you for reading!

comment below,please?

Back to my elementary school - SK Lohan

hai readers.

a few days ago,i went to my old school.like my very very first school Sekolah Kebangsaan Lohan,Ranau. :) a lot of things and landscape had changed but some remain the same,like the toilet? xD


kids these days,urghhh.when i was still a student,there was NO these kinds of vandalisme.


see that statue there??we used to sit there during recess,eating our nasi lemak while watching the fishes lmao.


apparently,icecream is FORBIDDEN.
i was like what the actual fug?!
you're not living a real life if there is no icecream at school!!!


this used to be the teacher's room.now its the ko-kum room.


there is a goddamn open hall on the field where we used to line up every monday.


this is what sabahan call 'gong'.


just a river where i used to catch berudu aka tadpoles,i even showered here umhaha.


50 cents (too salty) :/

and the glorious way of eating nasi lemak muehehe.

till then!babai~

How To - cover dark circles with concealer

hello cherries,

first of all,this How-to is really-really important because i honestly don't know aka no confidence to wear concealers until recently.often times either the concealer didn't match my skin resulting an awkward colour around my under eyes or the concealer creased,which ruin my whole look. :'( 

take note,panda eyes (sounds cuter isn't it lol) can be reduced.check my entry HERE.i personally tried the freezed towel method and it really worked. *nods* but im unable to practice it when im in college hence my dark circles are back and the reason why im doing this entry.

useful tips

/choose concealer that is warmer aka darker than your skin colour/

this is my favourite concealer so far.cost me RM19.90
Maybelline New York Pure Mineral Concealer.

1.start off with a clean face.


2. swipe a little amount of the conecealer on the back of your hand.
do not apply directly on the skin with the brush (for hygiene purpose)


3. apply evenly on your dark circles

if you apply thress dots on the right eyes,do the same to the left eye.

4. dab the concealer instead of swiping it,the heat from your finger will melt the concealer and blend it with your skin colour.


taadaah!

5. set the concealer with compact powder (any brand).this is necessary to prevent the concealer from creasing.

Lovely ME:EX BB Pact (i forgot the price)


i hope this entry helps you.as much as i want to make videos,i dont have cameras and so on -.-

bye!

DIY - Lips Scrub With Home Ingredients

hello!!!!

im currently at home,which Sabah whewww so happy to be back. ^^ city life can be quite suffocating i must say. *nod nod*

my lips got chappy and it looks so ugly whenever i put on lip tint or lipstick. -.-

THIS is a chappy lips.

anyway,i googled/Youtubed for a home remedy and i think i found one that's really effective (because i tried for myself duh)

 ingredients you'll need are...

  • honey
  • sugar
  • vaseline
  • small container
  • facial bowl (you can use the ordinary bowl,spoon etc)


 take a tablespoon of sugar (ordinary sugar by the way)

then a tablespoon of honey

pour the honey into the bowl with sugar

then,scoop a plentiful of vaseline

mix well with the sugar and honey.it should look something like this.

transfer into the small container

and voila,your DIY lip scrub!


i applied the lips scrub right away and it feels soapy and heavy on your lips.
scrub your lips,the sugar will work as the exfoliator while the honey and vaseline will moisten your lips.

after that,simply wipe off the scrub with tissues.

after that,use any lip balm of your choice.
in my case it's the peri's tint.


i forgot to take pictures of my before-after lips. -.- sorry guys.

goodbye readers,i will update more from now on!


Related Posts Plugin for WordPress, Blogger...